One of the most useful features found in cloud-based accounting software such as Xero and Saasu is the ability to upload and attach documents to various transactions. This is great because it means that not only are you complying with your record keeping requirements, but you can also verify your purchases with others. By “others” I mean your accountant, bookkeeper and yes, the ATO should they ask for supporting evidence. Most Saasu and Xero users will be aware that they can upload and attach source documents to sales and purchase invoices. What they may not be aware of is that you can also attach documents to journal transactions. Today I will show you how this done in Saasu.
What are journals? Journals are used in bookkeeping to record various business transactions. These may include business purchases paid via cash where a petty cash account does not exist, the purchase of significant capital items such as motor vehicles, land, equipment etc, and the introduction of funds into the business via a personal loan or another type of loan or to adjust accounts as required.
If you add a journal to your accounts quite often it displays very basic information such as what, who and how much. This is okay because it does the job i.e. the figures are brought into your accounts. However, an outsider looking at your accounts such as your accountant, bookkeeper or the ATO may wish to see more information and will ask for the original documentation. In the past, you would have to email or snail mail the documents to your advisor which is fine but it is time-consuming. A better way is to simply raise the new journal and then attach the original documentation to it. Suddenly your journals will become much more useful because now, whenever your advisor checks your journal, he or she can view the source documents immediately and use them to make adjustments if required or to simply check that you haven’t made an error. The ATO will love you too because you are complying with your record keeping requirements and if they audit you, they will be able to access the data quickly and easily.
Today I’m going to show you how to attach documents to a journal in Saasu. This example shows the purchase of a new vehicle via a chattel mortgage but of course, the example can be applied to any journal you may wish to create.
1. To raise a journal in Saasu, go to “Add”, then under “Advanced”, choose “Journal”.
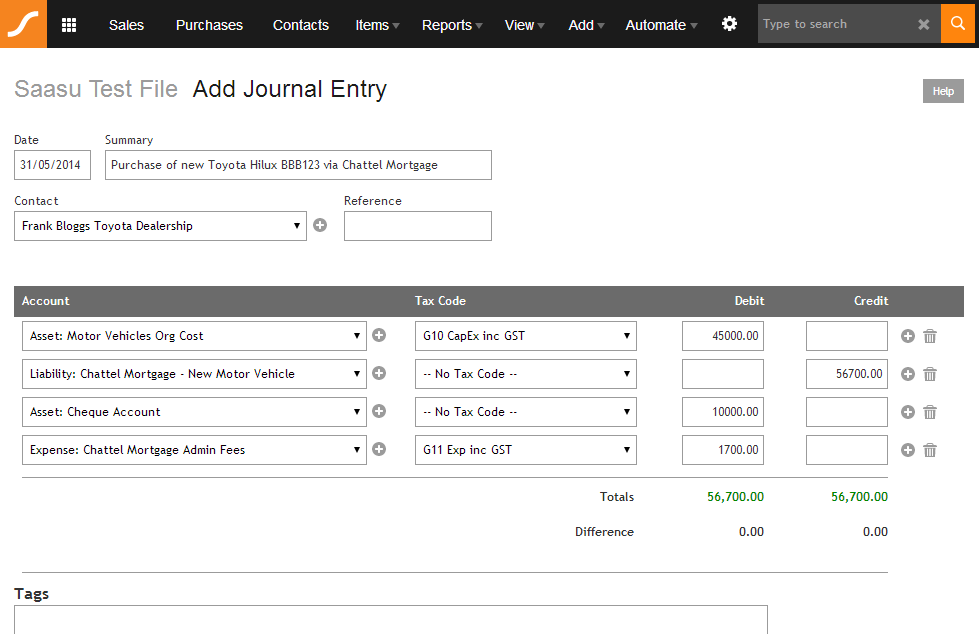
2. Raise your journal as required and click on “Save”. My example for this exercise looks like this:
(Notice how the information provided is fairly basic and doesn’t give the viewer much insight into the background of the purchase)
3. Scroll to the bottom of the page and you will see an option to attach documents:
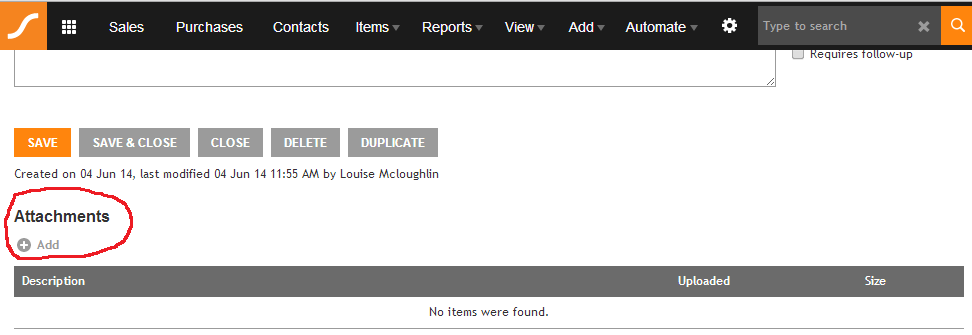
4. Click on “Add” under “Attachments” and this utility box will appear:

5. Click on “Choose File” and find the file from your computer that you wish to upload. Click on “Attach and Close” and voila, your document will be attached to this journal!
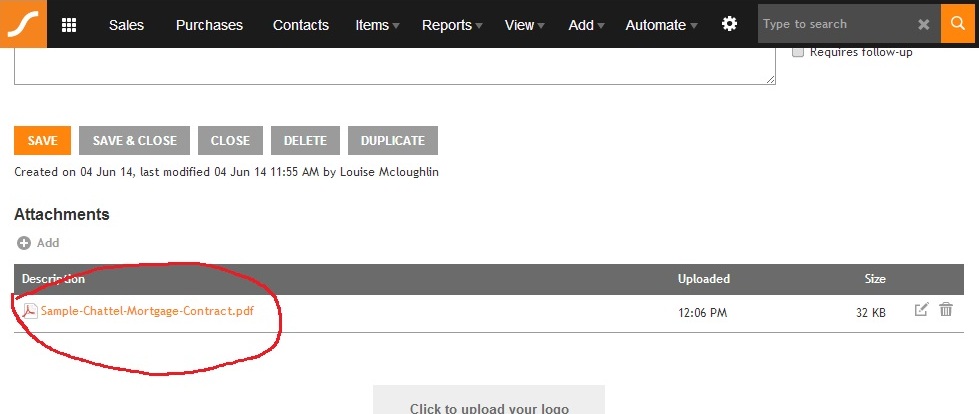
6. Now this journal has been given some “meat” and has become a whole lot more useful to anyone viewing it. If your advisor wants to find out more about this purchase, he or she can by simply clicking on the attachment. A once very basic transaction with very little information has been transformed into a neat little package showing both the figures and the actual purchase document. This will be sure to make your accountant and/or bookkeeper smile and even do a happy dance!
So that’s how it’s done in Saasu. If you would like to know how to do this in Xero, go to this link.
In summary, being able to attach source documents to transactions in cloud accounting software is so useful. It means that not only are you keeping your records properly, but you are also making it much easier for your advisors to work on your accounts. Because you are providing actual source documents, your advisors will be able to help you enter your data accurately and without error because they can see exactly what should be entered. This means that your accounts will always be accurate and you’ll have peace of mind – it’s a win-win situation 🙂